
Have the QR code ready
Open your LivaGoo order email on a second device or print the QR code.
Choose your device and follow the images step by step. All screen examples were created by LivaGoo and show exactly where to tap.
Install the eSIM before your trip over Wi-Fi. You can activate it at your destination.
Open your LivaGoo order email on a second device or print the QR code.
Wi-Fi or mobile data is required to download the eSIM profile.
Your smartphone must support eSIM and must not have a carrier lock.
Menu names may vary slightly by model and software version.
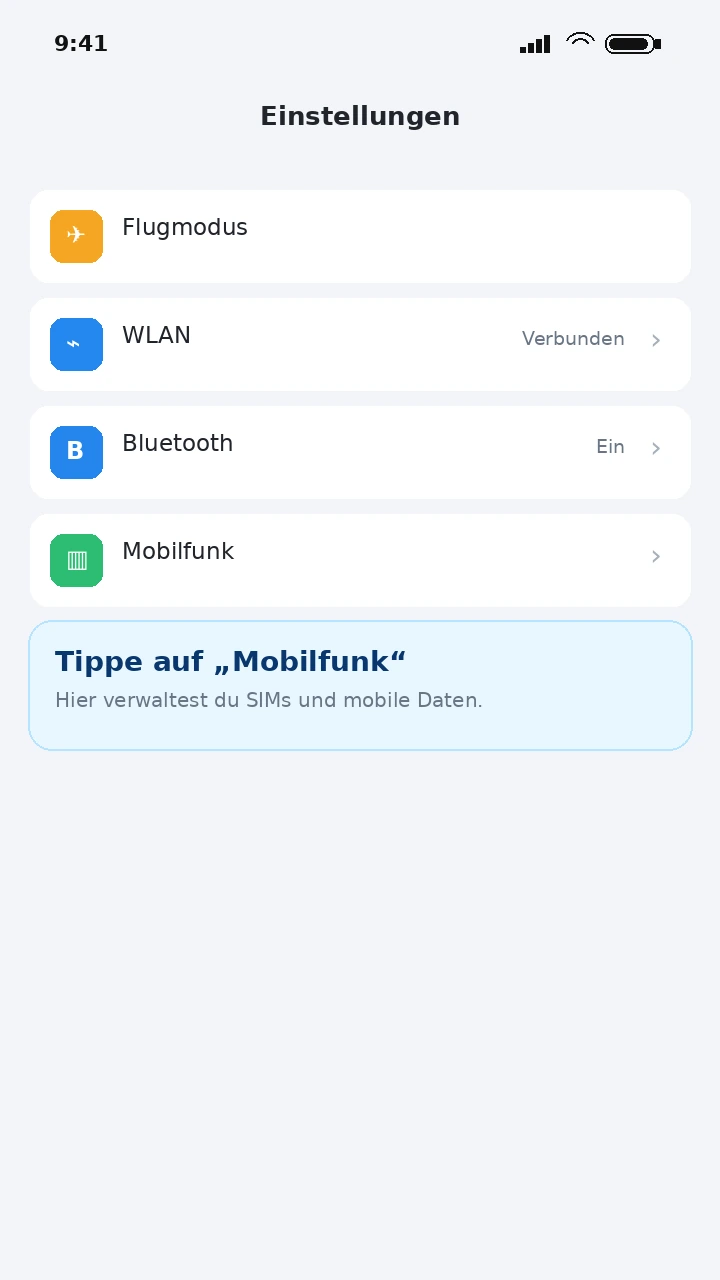
Open Settings und tippe auf Cellular.
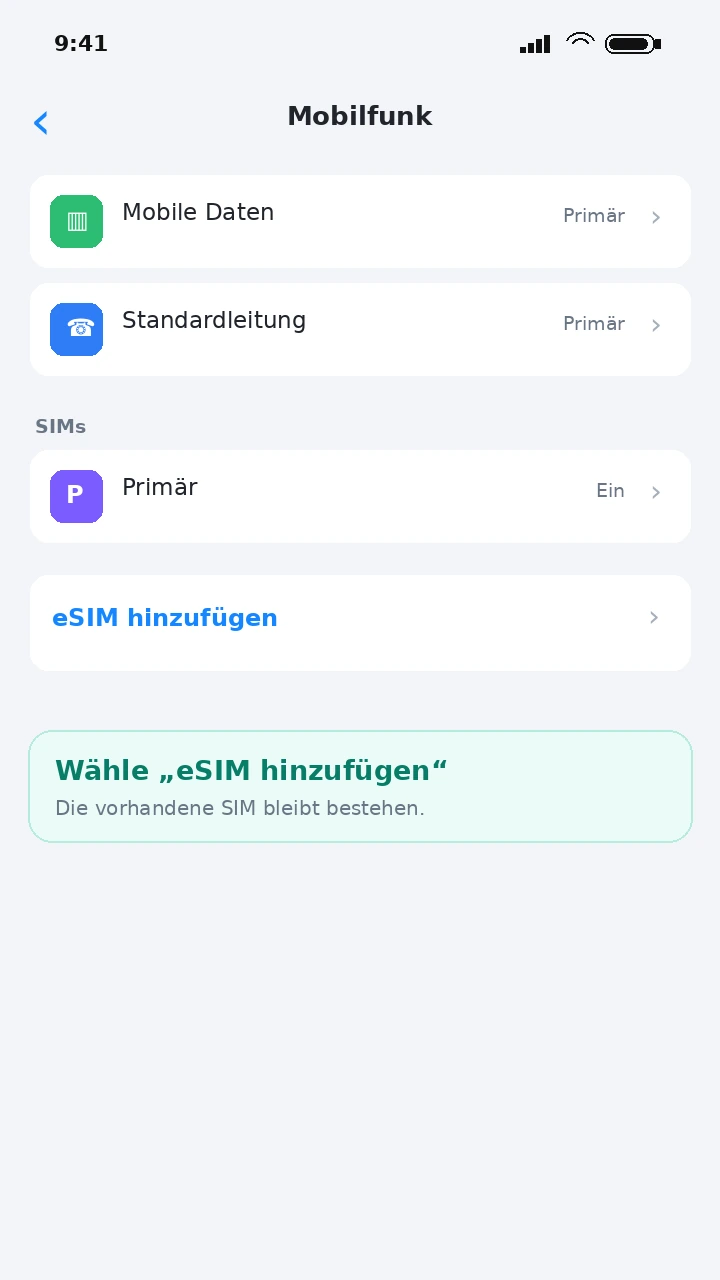
Tap Add eSIM oder bei älteren iPhones auf Add cellular plan.
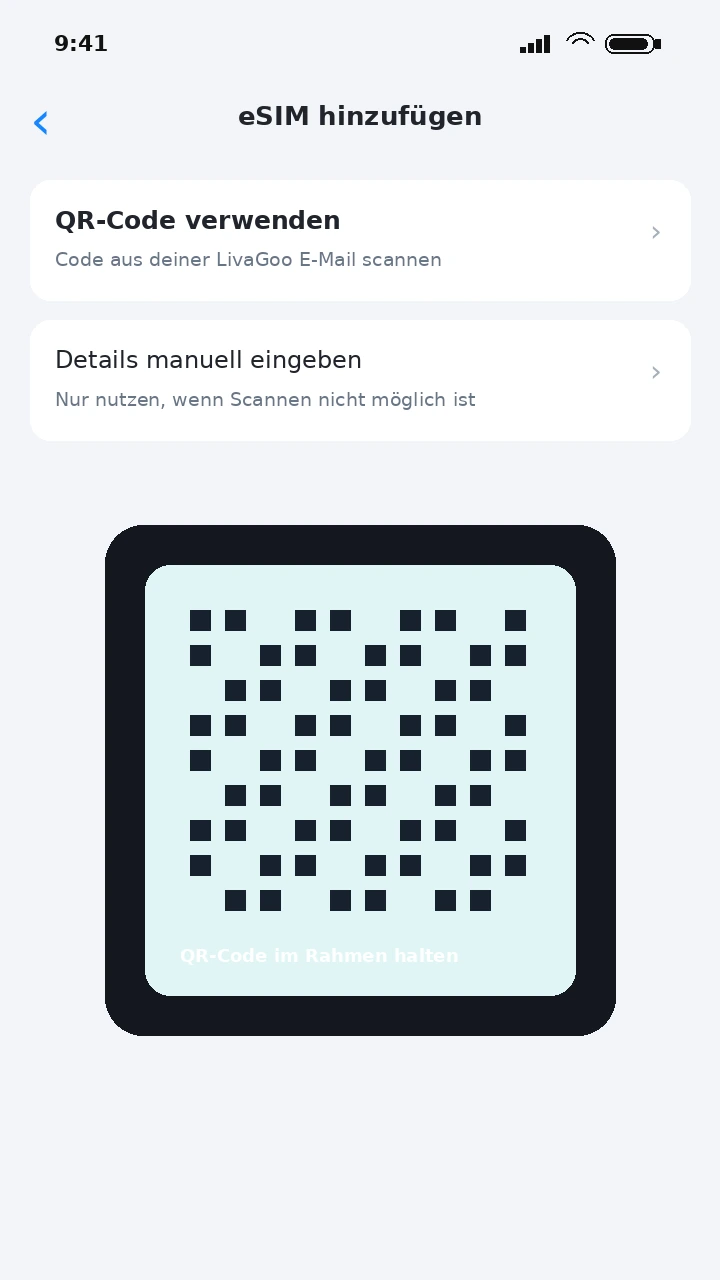
Select QR-Code verwenden und scanne den Code aus deiner Bestell-E-Mail.
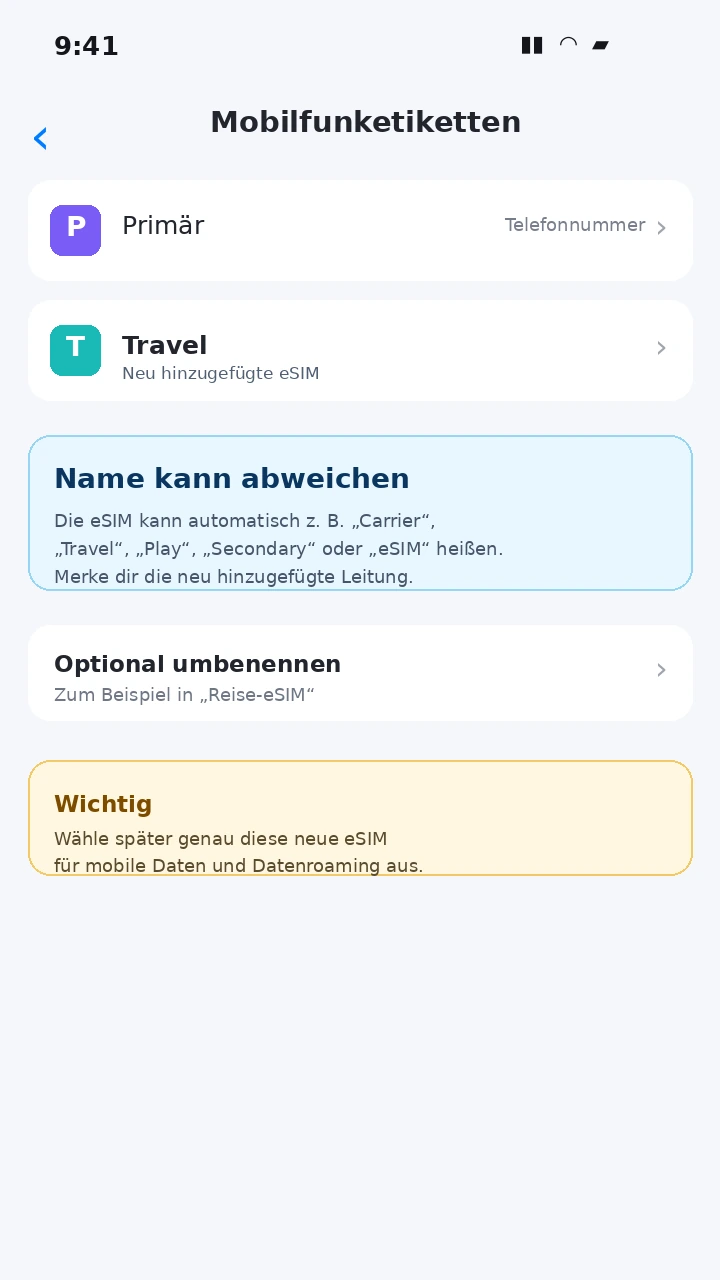
Der Name wird häufig automatisch vergeben und kann zum Beispiel Carrier, Travel, Play, Secondary oder eSIM lauten. Du kannst ihn anschließend freiwillig in Travel eSIM umbenennen.
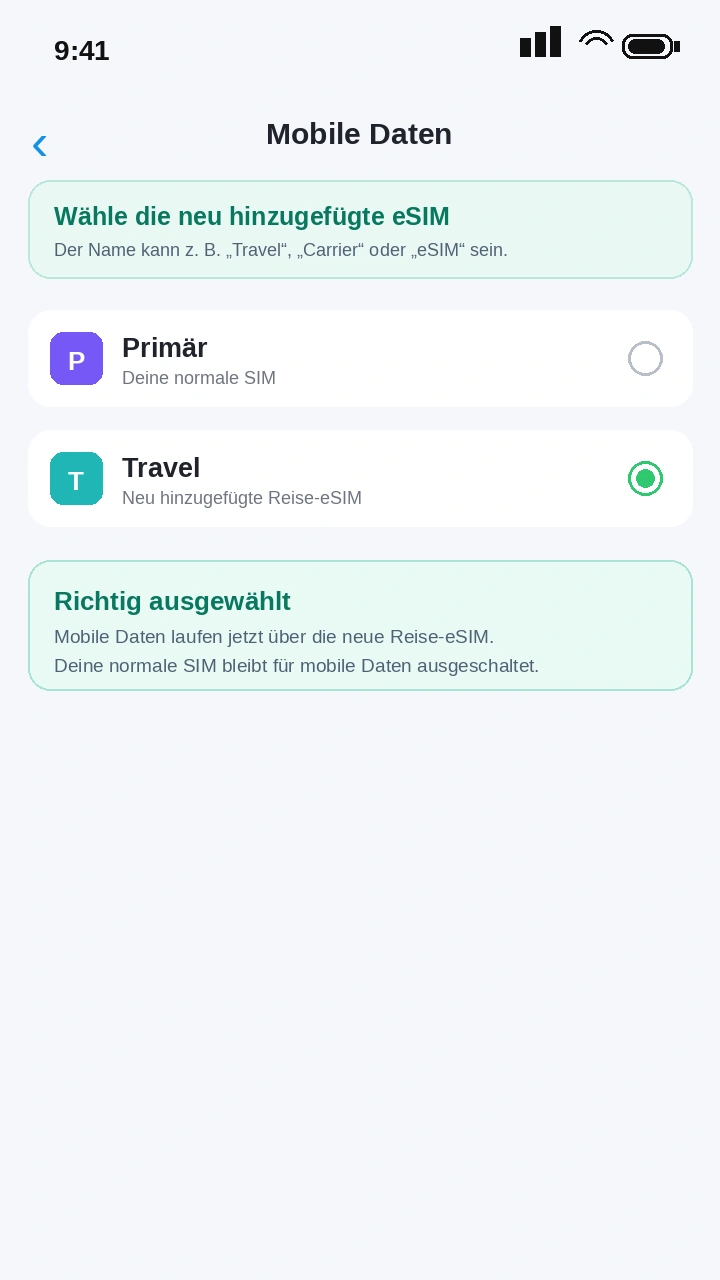
Select the neu hinzugefügte eSIM für mobile Daten. Achte auf den Namen, der beim Hinzufügen angezeigt wurde – zum Beispiel Carrier, Travel, Play oder eSIM.
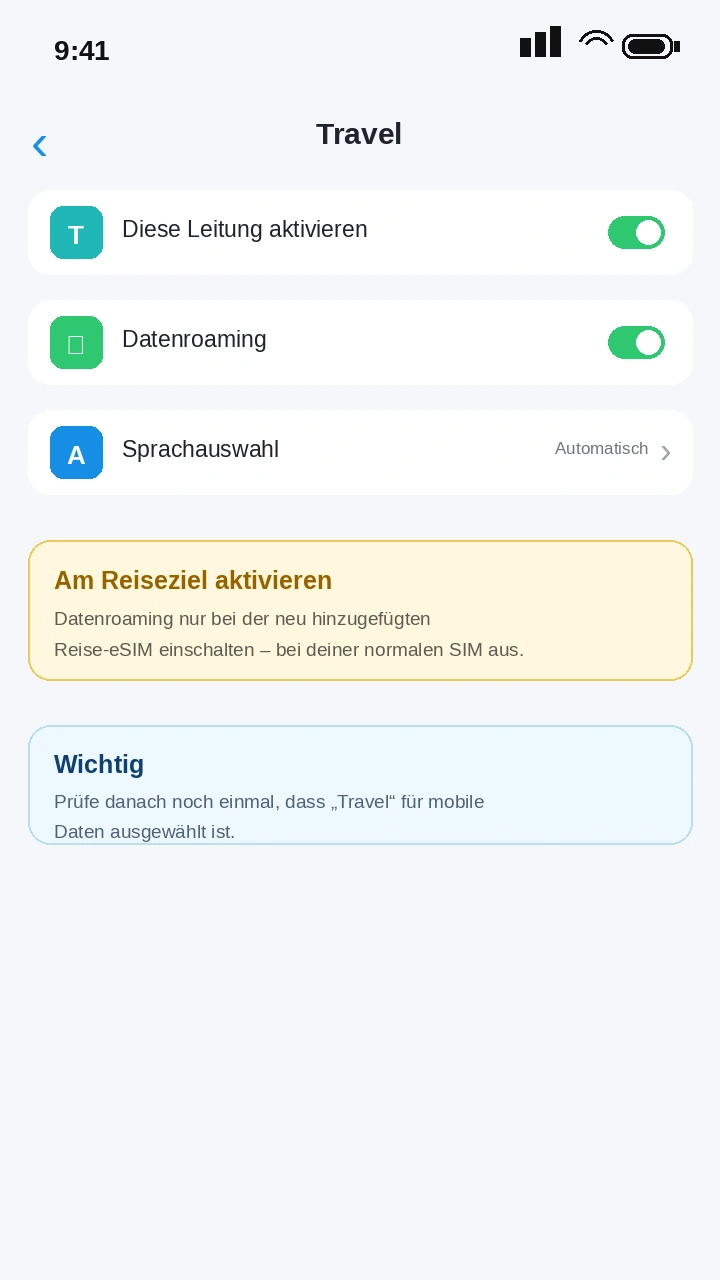
Open neu hinzugefügte eSIM und aktiviere Data roaming. Bei deiner normalen SIM sollte es ausgeschaltet bleiben.
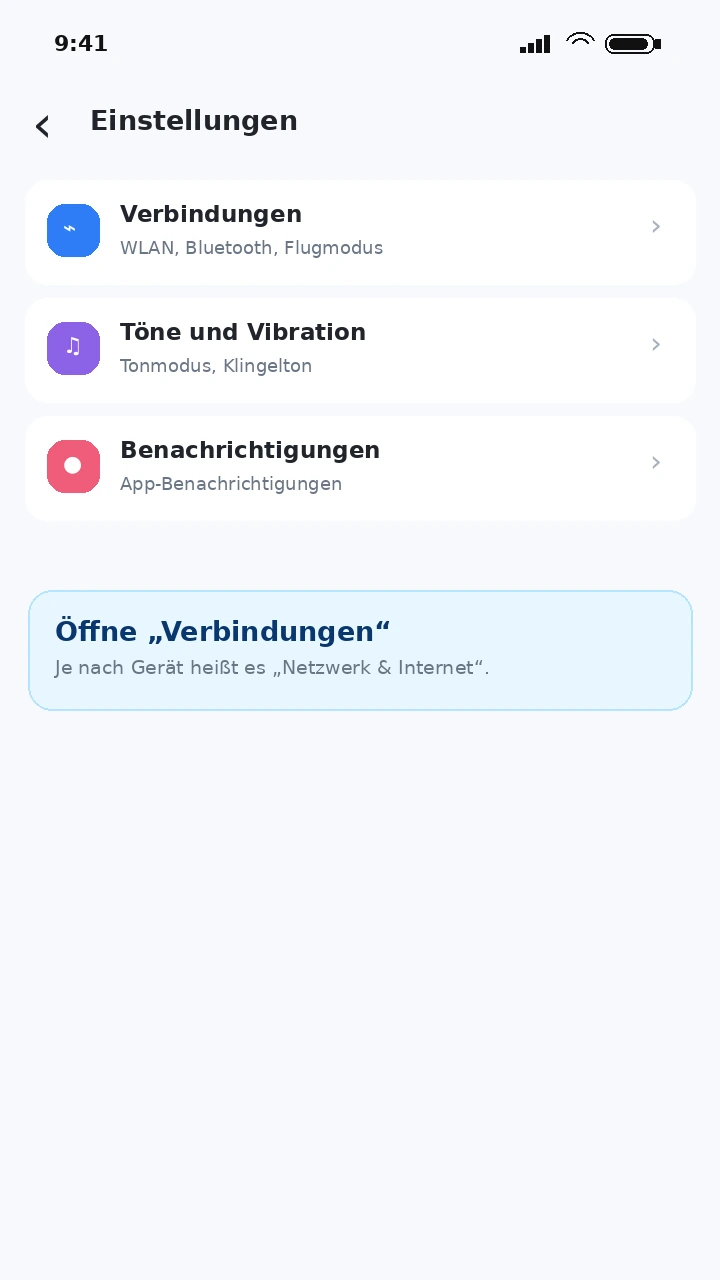
Open Settings und tippe auf Connections oder Network & Internet.
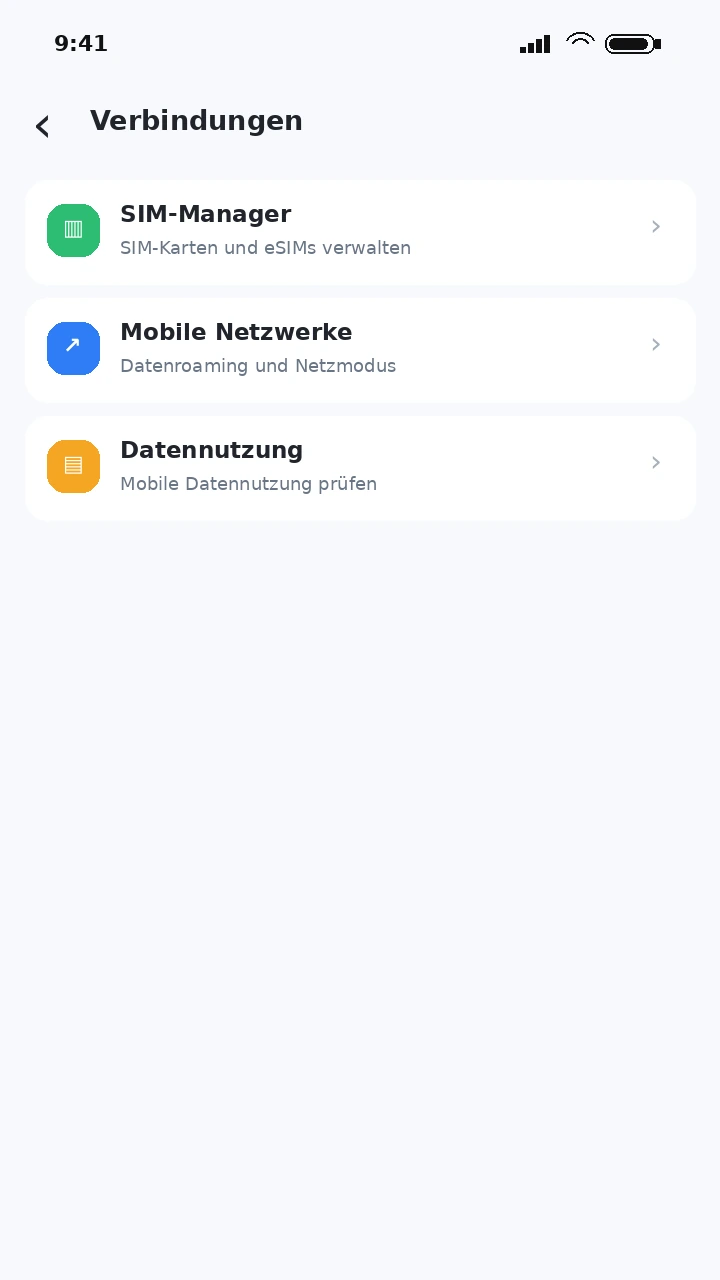
Open SIM manager, SIMs oder Mobile network.
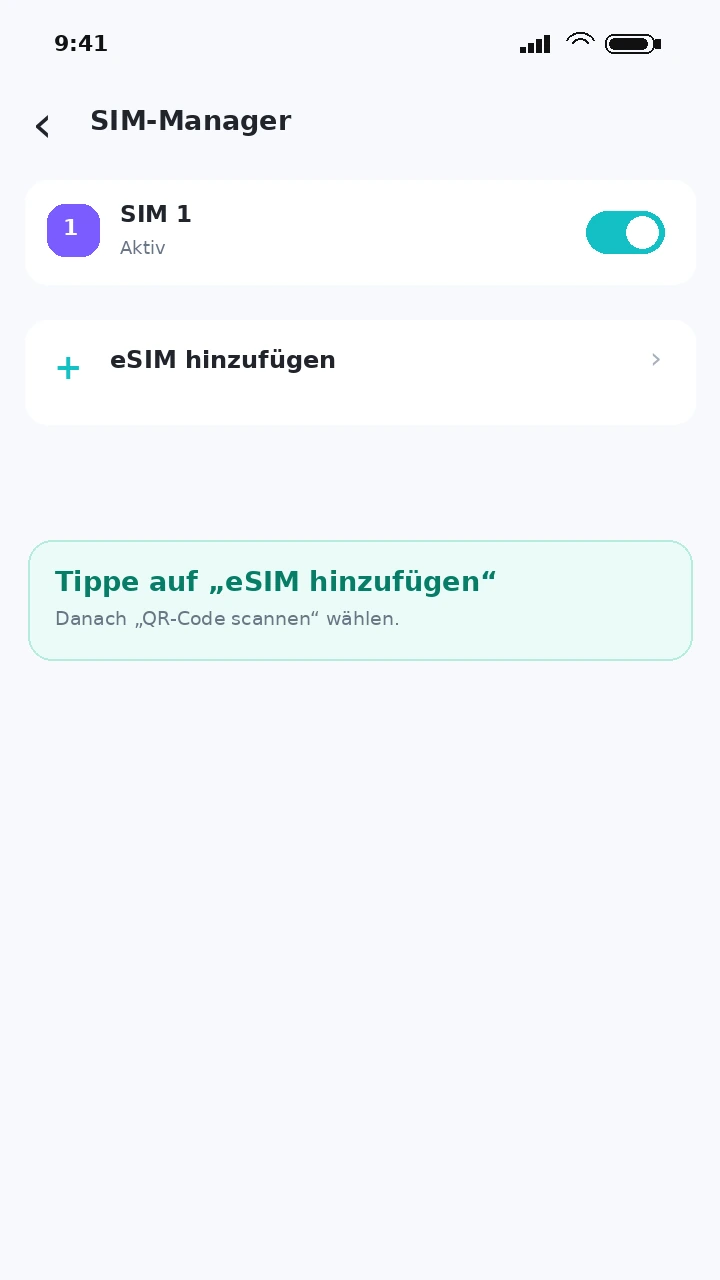
Tap Add eSIM, Add SIM oder Download SIM.
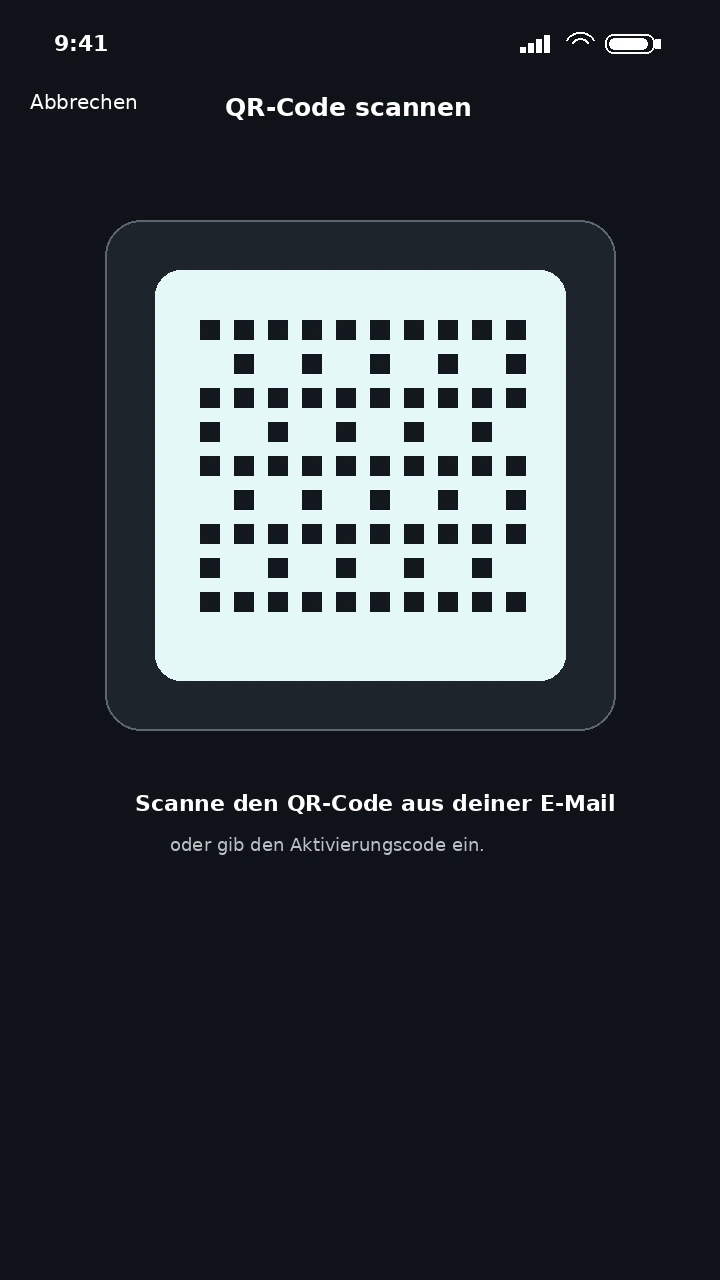
Scanne den QR-Code aus deiner LivaGoo E-Mail und bestätige das Herunterladen.
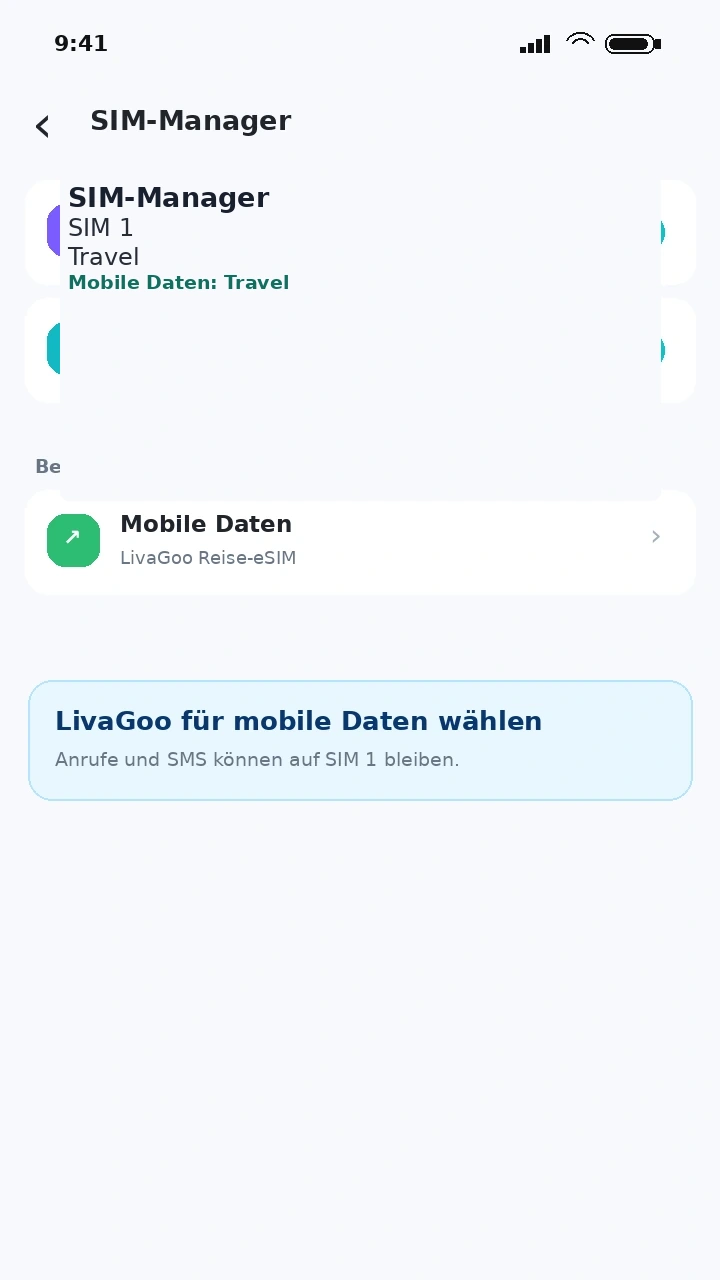
Select the neu hinzugefügte eSIM as the preferred SIM for mobile data. The displayed name may vary by provider and device.
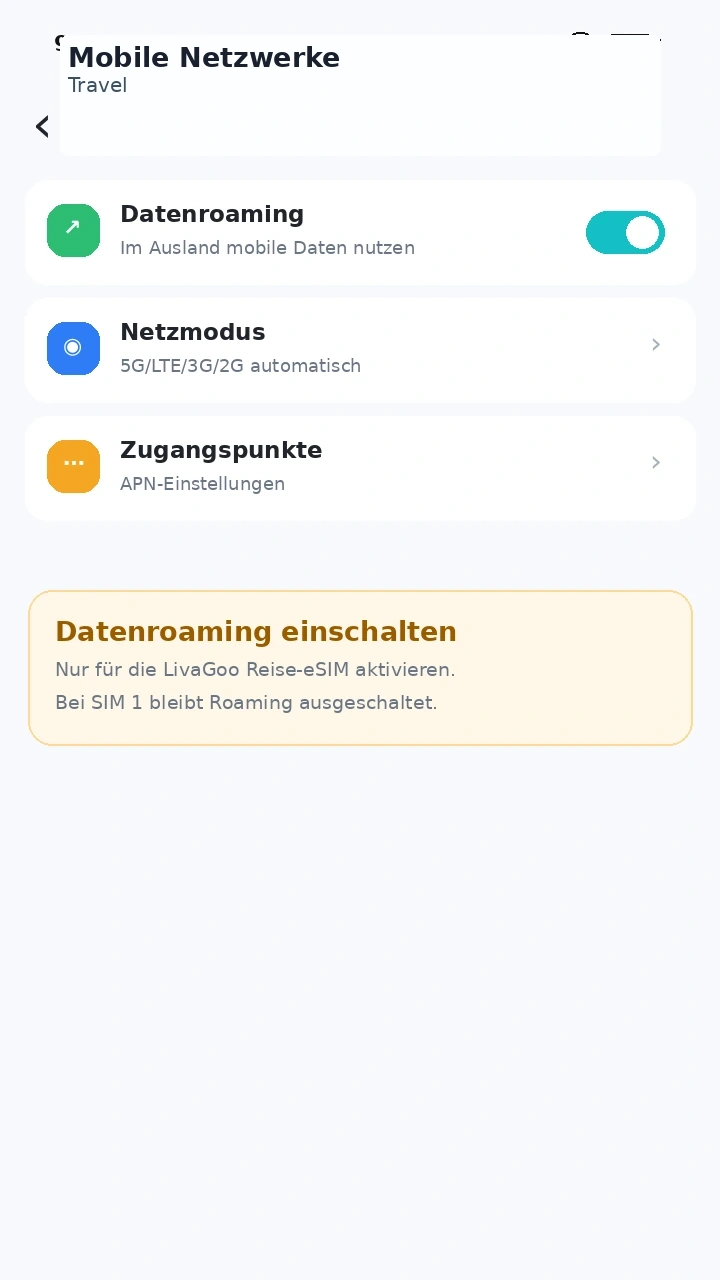
Enable data roaming only for the neu hinzugefügte eSIM. Bei deiner normalen SIM bleibt es aus.
Turn on the newly added line shortly before departure or after arrival. It may be named Carrier, Travel, Play or eSIM.
Make sure mobile data is actually using the newly added travel eSIM.
Data roaming must be enabled on the travel eSIM or it may not connect.
If there is no internet, toggle airplane mode or restart the device.
Sende uns am besten einen Screenshot der Stelle, an der du festhängst. Unser Support hilft dir per WhatsApp oder E-Mail weiter.
Erhöhe die Bildschirmhelligkeit des zweiten Geräts, halte die Kamera ruhig und prüfe, ob der Code vollständig sichtbar ist. Alternativ kannst du die Installationsdaten manuell eingeben.
Select the newly added eSIM for mobile data, enable data roaming on it and toggle airplane mode for about ten seconds. The eSIM may be named Carrier, Travel, Play, Secondary or similar.
Your regular SIM may remain in the device, but mobile data and roaming should be disabled for it. For maximum protection, remove or fully disable the physical SIM during the trip.
Viele eSIM-Profile lassen sich nur einmal laden. Entferne das Profil deshalb nicht, solange du es noch benötigst.